Vim安装Markdown预览插件markdown-preview.vim
https://github.com/iamcco/markdown-preview.vim
今天莫名其妙的把Node升级到v10.15.3,之前都版本都是8.几来的,然后碰巧提交了hexo,然后发现CSS样式显示异常,查看网站源码定位是因为找不到相应的CSS文件,然后手动提交了CSS代码,发现效果比之前都好看了一点点,但是整体效果还是很丑。
作者:leohxj
链接:https://zhuanlan.zhihu.com/p/34223150
来源:知乎
著作权归作者所有。商业转载请联系作者获得授权,非商业转载请注明出处。
Git是一款免费、开源的分布式版本控制系统。众所周知的Github便是基于Git的开源代码库以及版本控制系统,由于其远程托管服务仅对开源免费,所以搭建本地Git服务器也是个较好的选择,本文将对此进行详细讲解。(推荐一家提供私有源代码免费托管的网站:Bitbucket,目前支持一个项目5个成员)
服务器:intel i5 / 8g内存 / 64位操作系统 Ubuntu 15.04
PC: intel i5 / 8g内存 / 64位操作系统 Windows 7 旗舰版
初始化操作
$ git config -global user.name <name> #设置提交者名字
$ git config -global user.email <email> #设置提交者邮箱
$ git config -global core.editor <editor> #设置默认文本编辑器
$ git config -global merge.tool <tool> #设置解决合并冲突时差异分析工具
$ git config -list #检查已有的配置信息
创建新版本库
$ git clone <url> #克隆远程版本库
$ git init #初始化本地版本库
修改和提交
$ git add . #添加所有改动过的文件
$ git add <file> #添加指定的文件
$ git mv <old> <new> #文件重命名
$ git rm <file> #删除文件
$ git rm -cached <file> #停止跟踪文件但不删除
$ git commit -m <file> #提交指定文件
$ git commit -m “commit message” #提交所有更新过的文件
$ git commit -amend #修改最后一次提交
$ git commit -C HEAD -a -amend #增补提交(不会产生新的提交历史纪录)
查看提交历史
$ git log #查看提交历史
$ git log -p <file> #查看指定文件的提交历史
$ git blame <file> #以列表方式查看指定文件的提交历史
$ gitk #查看当前分支历史纪录
$ gitk <branch> #查看某分支历史纪录
$ gitk --all #查看所有分支历史纪录
$ git branch -v #每个分支最后的提交
$ git status #查看当前状态
$ git diff #查看变更内容
撤消操作
$ git reset -hard HEAD #撤消工作目录中所有未提交文件的修改内容
$ git checkout HEAD <file1> <file2> #撤消指定的未提交文件的修改内容
$ git checkout HEAD. #撤消所有文件
$ git revert <commit> #撤消指定的提交
分支与标签
$ git branch #显示所有本地分支
$ git checkout <branch/tagname> #切换到指定分支或标签
$ git branch <new-branch> #创建新分支
$ git branch -d <branch> #删除本地分支
$ git tag #列出所有本地标签
$ git tag <tagname> #基于最新提交创建标签
$ git tag -d <tagname> #删除标签
合并与衍合
$ git merge <branch> #合并指定分支到当前分支
$ git rebase <branch> #衍合指定分支到当前分支
远程操作
$ git remote -v #查看远程版本库信息
$ git remote show <remote> #查看指定远程版本库信息
$ git remote add <remote> <url> #添加远程版本库
$ git fetch <remote> #从远程库获取代码
$ git pull <remote> <branch> #下载代码及快速合并
$ git push <remote> <branch> #上传代码及快速合并
$ git push <remote> : <branch>/<tagname> #删除远程分支或标签
$ git push -tags #上传所有标签
Git支持本地(local)、ssh、git和http(s)这四种协议进行传输,本部分将基于ssh协议搭建(此协议不利于开源,适合公司团队使用)。
本文操作大部分在Ubuntu服务器端完成。
1、我们在服务器端新增加一个用户(本文为gitadmin)用于管理git仓库:
Ubuntu下启动终端,键入命令:
$ sudo useradd -m gitadmin --首次执行sudo命令需要按提示输入管理员密码
$ sudo passwd gitadmin --设置用户gitadmin密码
将gitadmin设置为管理员用户,方法很多,这里用通过修改sudoers文件实现:
$ sudo vim /etc/sudoers
接下来进到vim编辑器,键入i进入插入模式,找到下面这行并添加gitadmin:
# User privilege specification
root ALL=(ALL:ALL) ALL
gitadmin ALL=(ALL:ALL) ALL
键盘esc退出插入模式,输入冒号(:),光标出现在底端,输入wq回车退出。
$ su gitadmin --输入刚刚设置的密码切换到gitadmin用户
2、安装配置ssh服务
$ sudo apt-get install openssh-server openssh-client
按提示输入管理员密码,同意[Y],安装完毕。OpenSSH为自由软件,是ssh的开源实现。
$ sudo vim /etc/ssh/sshd_config
找到下面几行,去掉前面"#"注释,并设置:
StrictModes no --在用户名和其公钥文件名不匹配时将通过验证
RSAAuthentication yes --使用纯的RSA认证
PubkeyAuthentication yes --允许Public Key AuthorizedKeysFile %h/.ssh/authorized_keys
上面这个配置是设定免密码登陆的账号公钥存储路径
ps:如果是小团队,把每个人的公钥收集起来放到/home/git/.ssh/authorized_keys文件里问题不大;如果团队较大或是有权限要求,这种方式就很不灵活了,这时可以用Gitosis来管理公钥,我将在后文介绍。
接着重启ssh服务
$ sudo service ssh restart 或是 $ sudo /etc/init.d/ssh restart
ssh服务器到这里安装配置完毕。
出于安全考虑,可以在本教程配置完毕后设置gitadmin用户不允许登录shell,可通过 用vim打开编辑/etc/passwd文件并找到下面的一行(自行创建的用户名):
gitadmin:x:1001:1001:,,,:/home/gitadmin:/bin/bash
改为:
gitadmin:x:1001:1001:,,,:/home/gitadmin:/usr/bin/git-shell
这样,gitadmin用户可以正常通过ssh使用git,但无法登录shell,因为我们为gitadmin 用户指定的git-shell每次一登录就自动退出
3、安装配置git服务器
$ sudo apt-get install git git-core --安装git服务器
$ sudo mkdir /home/gitadmin/repositories --创建git仓库存储目录
$ sudo chown gitadmin:gitadmin /home/gitadmin/repositories --设定所有者
$ sudo chmod 755 /home/gitadmin/repositories --设置仓库访问权限
接下来初始化全局设置
$ git config --global user.name “gitadmin”
$ git config --global user.email “gitadmin@server”
@后的server为本机IP,可用ifconfig查看
4、基本的git服务器(without gitosis)
这里是git本地服务器最基本的实现,不使用下文讲解的gitosis进行管理,适合人数较 少并且没有权限管理要求的小团队。
PC客户端:
首先安装git客户端(参见后文方法)
配置无密码登陆需拷贝pc端公钥至/home/git/.ssh/authorized_keys,在git.bash下:
$ ssh-keygen -t rsa --生成本机密钥,公钥默认在~/.ssh/id_rsa.pub
$ ssh-copy-id gitadmin@host --上传公钥,远程主机host为服务器IP
若不用以上命令,用下面这条命令则清楚地解释了公钥的保存过程:
$ ssh gitadmin@host 'mkdir -p .ssh && cat >> .ssh/authorized_keys' < ~/.ssh/id_rsa.pub
Ubuntu服务器端:
你可以在服务器端自行创建仓库,先选定一个目录作为Git仓库,假定是/srv/sample.git, 在/srv目录下输入命令:
$ sudo git init --bare sample.git
$ sudo chown -R gitadmin:gitadmin sample.git --把owner改为gitadmin
这样Git就会创建一个裸仓库,裸仓库没有工作区,因为服务器上的Git仓库纯粹是为 了共享,所以不让用户直接登录到服务器上去改工作区,并且服务器上的Git仓库通常 都以.git结尾。
至此,最基本的git本地服务器已经搭建完毕,可以通过git clone命令克隆远程仓库在各自电脑上运行了。
5、安装配置gitosis
简单地说,Gitosis 就是一套用来管理 authorized_keys文件和实现简单连接限制的脚本。有趣的是,用来添加用户和设定权限的并非通过网页程序,而只是管理一个特殊的 Git 仓库。你只需要在这个特殊仓库内做好相应的设定,然后推送到服务器上,Gitosis 就会随之改变运行策略。
创建管理员公钥和私钥:
在默认用户的主目录路径下,运行以下命令,按照提示创建(可直接回车略过) $ ssh-keygen -t rsa
默认生成2048位,如果需要提高安全级别,也可以通过下面的命令
$ ssh-keygen -t rsa -b 4096
公钥和私钥默认会保存在~/.ssh目录下,如下所示:
id_rsa id_rsa_pub(公钥) known_hosts
安装gitosis:
安装python的setup tool
$sudo apt-get install python-setuptools
获取并安装gitosis
$ cd /tmp --切换到缓存目录下载安装包,在关机时会被系统自动清理
$ git clone https://github.com/tv42/gitosis.git --下载安装包
$ cd gitosis
$ sudo python setup.py install --到此gitosis安装完成
配置gitosis:
gitosis会默认将git仓库放在gitadmin主目录下,并自动管理authorized_keys文件 :
$ cp ~/.ssh/id_rsa.pub /tmp --拷贝出管理员公钥
向gitosis添加公钥并初始化:
$ sudo -H -u gitadmin gitosis-init < /tmp/id_rsa.pub
Initialized empty Git repository in /home/gitadmin/repositories/gitosis-admin.git/
Reinitialized existing Git repository in /home/gitadmin/repositories/gitosis-admin.git/
这样该公钥的拥有者gitadmin就能修改用于配置Gitosis的那个特殊Git仓库了。接 下来,需要手工对该仓库中的post-update 脚本加上可执行权限:
$ sudo chmod 755 /home/gitadmin/repositories/gitosis-admin.git/hooks/post-update
到此为止git服务器端的搭建结束,管理员为gitadmin。
6、仓库管理员信息:
现在在终端下进到用户主目录,克隆Gitosis的控制仓库:
$ git clone gitadmin@server:gitosis-admin.git
当前目录下将得到一个名为 gitosis-admin 的工作目录,主要由两部分组成:
$ cd gitosis-admin
$ find .
./gitosis.conf
./keydir
./keydir/gitadmin.pub
gitosis.conf 文件是用来设置用户、仓库和权限的控制文件。keydir 目录则是保存所有 具有访问权限用户公钥的地方(每人一个)。在 keydir 里的文件名(如我gitadmin.pub) 应该跟你的不一样,Gitosis会自动从使用 gitosis-init 脚本导入的公钥尾部描述中获取 该名字。用编辑器 gitosis.conf 文件的内容,只包含与刚刚克隆的 gitosis-admin 相关 的信息:
$ cat gitosis.conf
[gitosis]
[group gitosis-admin]
members = gitadmin
writable = gitosis-admin
它显示用户 gitadmin是唯一能管理 gitosis-admin 项目的人。
PC客户端下:
1、安装git客户端
访问git官网,下载安装包(许多Windows上的git服务都以msysgit作为支撑支撑软件,建议读者安装):

下载后按默认配置安装完毕,会出现git.bash命令行工具:
1、接下来的pc端工作在git.bash命令行内完成:
测试能否ssh登录远程主机:
$ cd ~
$ ssh gitadmin@host --远程登录
由于无法确认远程host主机的真实性,shell会告诉你它的公钥指纹让你确认,键入yes:
Are you sure you want to continue connecting (yes/no)? yes
输入远程主机gitadmin的密码,正常情况下这里就能够登录成功,显示gitadmin用户
$ exit --退出远程登录
配置免密码登陆:
$ ssh-keygen -t rsa --生成本机密钥,公钥默认在~/.ssh/id_rsa.pub
未使用gitosis情况下执行:
$ ssh-copy-id gitadmin@host --上传公钥,远程主机host为服务器IP
使用gitosis管理公钥则执行:
$ scp ~/.ssh/id_rsa.pub gitadmin@host:/tmp --远程拷贝公钥至服务器临时目录
2、可视化工具
在安装官方git的同时,它也给我们提供了gitk 和 git-gui两种可视化工具:
gitk 是一个历史记录的图形化查看器。
cd 到一个Git仓库,然后键入:
$ gitk [git log options]
git-gui 则主要是一个用来制作提交的工具:
$ git gui
注意:
本部分末参考链接里有官网推荐的Git图形化客户端(github上还有更多选择),更亲近不熟悉命令行的使用者。由于这一部分的选择较多,但究其实现原理还是一样的,所以这里就不做延伸。请使用者参考本文或搜索自行选择的客户端相应教程进行配置。
Ubuntu服务器端下:
1、管理gitosis:
$ cd ~
$ git clone gitadmin@host:/home/gitadmin/gitosis-admin.git
$ cd gitosis-admin/
接下来各个用户按照前面安装配置gitosis时提到的办法生成各自的ssh公钥文件后, scp上传到服务器/tmp 目录下,也可由服务器管理员手动取得,并最终重命名为各用户 名后拷贝到keydir目录下,就能实现使用git协同作业了。
2、gitosis.conf文件讲解:
[gitosis]
[group gitosis-admin]
writable = gitosis-admin
members = a@server1
[group developers]
writable = helloworld
members = a@server1 b@server2
[group test]
readonly = helloworld
members = c@server3
这个配置文件表达了如下含义:gitosis-admin组成员有a,该组对gitosis-admin仓库 有读写权限; developers组有a,b两个成员,该组对helloworld仓库有读写权限; test 组有c一个成员,对helloworld仓库有只读权限。当然目前这些配置文件的修改只是 在你的本地,你必须推送到gitserver上才能真正生效。
操作方法:
加入新文件、提交并推送到git服务器:
$ git add . --添加命令,这里的点’.’表示当前目录
$ git commit -am "add helloworld project and users" --提交,并描述此次行为
$ git remote add origin ssh://gitadmin@host:helloworld.git
添加远程主机
$ git push origin master --推送到服务器master分支
这里介绍远程主机URL修改方法,需要进到待修改仓库目录下:
方法一:先删除$ git remote rm origin 再添加$ git remote add origin URL
方法二:$ git remote set-url origin URL
方法三:进入.git目录下修改config文件
3、演示操作
现在我们来添加一个新项目。为此我们要建立一个名为mobile的新段落,在其中罗列 手机开发团队的开发者,以及他们拥有写权限的项目。由于 'gitadmin' 是系统中的唯 一用户,我们把他设为唯一用户,并允许他读写名为 iphone_project 的新项目:
[group mobile]
members = gitadmin
writable = iphone_project
修改完之后,提交 gitosis-admin 里的改动,并推送到服务器使其生效:
选择目录创建裸仓(本步骤可省略,我们不用事先到服务器上手工创建该项目的裸仓库, Gitosis会在第一次遇到推送时自动创建):
$ mkdir iphone_project.git
$ sudo git init --bare iphone_project.git
$ sudo chown -R gitadmin:gitadmin iphone_project.git
添加新工程并提交用户组:
$ git commit -am 'add iphone_project and mobile group'
在新工程 iphone_project 首次推送数据到服务器前,得先设定该服务器地址为远程 仓库,注意使用gitosis可以不用指明完整路径,只需要一个冒号加项目名字即可, Gitosis会自动帮你映射到实际位置:
$ git remote add origin gitadmin@host:iphone_project.git
推送到服务器:
$ git push origin master
要和朋友们在一个项目上协同工作,就得重新添加他们的公钥。不过这次不用在服务器 上一个一个手工添加到 ~/.ssh/authorized_keys 文件末端,而只需管理 keydir 目录中的 公钥文件(文件的命名由 gitosis.conf 中用户的标识名决定),并修改gitosis.conf , 最后用前面的方法推送到服务器配置生效。
现在我们为 John,Josie 和 Jessica 添加公钥:
$ cp /tmp/id_rsa.john.pub keydir/john.pub
$ cp /tmp/id_rsa.josie.pub keydir/josie.pub
$ cp /tmp/id_rsa.jessica.pub keydir/jessica.pub
然后把他们都加进 'mobile' 团队,让他们对 iphone_project 具有读写权限:
[group mobile]
members = scott john josie jessica
writable = iphone_project
如果你提交并推送这个修改,四个用户将同时具有该项目的读写权限。
Gitosis 也具有简单的访问控制功能。如果想让John只有读权限,可以这样做:
[group mobile]
members = scott josie jessica
writable = iphone_project
[group mobile_readonly]
members = john
readonly = iphone_project
现在 John 可以克隆和获取更新,但 Gitosis 不会允许他向项目推送任何内容。像这 样的组可以随意创建,多少不限,每个都可以包含若干不同的用户和项目。甚至还可以 指定某个组为成员之一(在组名前加上 @前缀),自动继承该组的成员:
[group mobile_committers]
members = scott josie jessica
[group mobile]
members = @mobile_committers
writable = iphone_project
[group mobile_another]
members = @mobile_committers john
writable = another_iphone_project
如果遇到意外问题,试试看把 loglevel=DEBUG 加到 [gitosis] 的段落,即把日志设置为调试级别,记录更详细的运行信息。如果一不小心搞错了配置,失去了推送权限,也可以手工修改服务器上的 /home/git/.gitosis.conf 文件,因为Gitosis 实际是从该文件读取信息的。它在得到推送数据时,会把新的 gitosis.conf 存到该路径上。所以如果你手工编辑该文件的话,它会一直保持到下次向gitosis-admin 推送新版本的配置内容为止。
本部分将讲解如何基于浏览器访问Git服务器,虽然 GitWeb 相当简单,但眼下有一些更现代,功能更全的Git服务器,其中有几个开源的解决方案可供人们选择安装。GitLab是其中最出名的一个,我将使用它作为示例并讨论其安装和使用。这比GitWeb要复杂的多并且需要更多的维护,但它是一个功能更为健全的方案。
1、安装gitlab:
GitLab是一个数据库支持的开源web应用,可通过Web界面进行访问公开的或者私人项目。它是一个拥有Github类似的功能、实现了自托管的Git项目仓库。所以相比于其他git服务器,它的安装过程涉及到更多的东西。幸运的是,这个过程有非常详细的文档说明和支持,而且在Bitnami(一个产生的开源软件的项目)可以获取一键安装包:

在Ubuntu服务器端打开Bitnami,由于我的是64位操作系统,选择第一个进行下载。(本教程基于gitlab 8.7.4-0)完成之后在终端下用cd命令进入其所在目录:
$ sudo chmod +x bitnami-gitlab-8.7.3-0-linux-installer.run --修改权限,文件名以自己为准
$ sudo ./bitnami-gitlab-7.4.3-0-linux-installer.run --以管理员权限执行安装
接下来将出现如下安装界面(此前服务器需要安装SSH server),整个过程基本点击Next就可以完成安装:

注意这里的小叉代表勾选

设置你自己的邮箱、登录名、密码,这将在之后的网页端作为管理员账户登录信息

如果你的默认端口80, 3306有占用,则需要修改或者解除占用。我的80端口由于之前安装过Apache而被占用,所以我将之卸载。(此一键安装包已经内置了Apache2)
这里提供一条卸载命令:$ sudo apt-get autoremove [application or package-name]

用户在网页端注册的时候需要对所填邮箱进行验证,所以这里的mail support建议勾选上,邮箱验证没通过是无法登录gitlab的。当然如果你在此并没有勾选或者注册后没有收到验证邮件也不要紧,在管理员登录网页端后,在全局设置界面可以方便的通过所有待验证用户。接下来一路Next直至Finish,Gitlab的安装到此完成,之后会有帮助窗口出现,有兴趣可以看看。

注意,在安装的目录下有个文件:ctlscript.sh,通过./ctlscript.sh可以关闭和启动gitlab服务器:(具体见README文件)
$ sudo /opt/gitlab-8.7.3-0/ctlscript.sh [start/stop/restart]
gitlab在安装目录下有一个GUI管理控制台,启动命令:
$ sudo /opt/gitlab-8.7.3-0/manager-linux-x64.run
2、用户管理:
管理员登录:
接下来咱们打开Ubuntu的浏览器,在地址栏输入localhost/将打开gitlab登录页面,输入注册时设置的邮箱(或者登录名)以及密码,进入gitlab。
注意:这里的地址也可以输入安装过程中提示的本地IP,我的是127.0.1.1;如果在局域网内其他电脑上,则在地址栏输入服务器IP。(Ubuntu命令行下ifconfig可以得到本地IP)

新用户注册:
在客户端电脑打开浏览器,在地址栏输入局域网服务器IP进入登录/注册页面:

邮箱验证(如果没收到邮件继续参照下方操作)

回到刚刚登录的服务器端的浏览器管理员页面,点击右上角的全局设置(下图中的扳手)
![]()
点击左侧面板的Users

刚刚在PC端注册的新用户developer01出现在这里,点击用户名:
![]()
就能在接下来的页面对其手动进行验证,点击Confirm user,此验证栏将消失,代表新用户developer01已经通过验证,注册成功。此时的PC端再次登录就可以进入Gitlab啦!

经过以上的操作,希望大家对Gitlab页面布局有一定的熟悉,接下来我将讲解在各种环境下如何部署项目代码仓库并进行基本操作。
Gitlab的管理员页面中,在左侧的面板下可以非常便捷地创建用户、用户组、新工程,并进行管理,还集成了各类事件消息。在为新工程添加用户时可以设置其权限,添加后同样可以在左侧面板的Members选项面对其进行管理。
比如我在管理员端创建了mobiledevelopers用户组,并在该组下创建了新工程mobile_dev,并添加了用户developer01,而此时的developer01并没有办法对此项目仓库进行Git操作,提示需要添加SSH秘钥:

参考前文生成的我们需要的ssh公钥,其储存路径为~/.ssh/id_rsa.pub(用户主目录下.ssh/文件夹的id_rsa.pub),找到并用任意文本编辑器(推荐Notepad++)打开,复制其全部内容(Ctrl+A、Ctrl+C),返回浏览器页面点击add an SSH key :

将公钥粘贴(Ctrl+V)至key栏,下边的Title在点击时将自动填充,最后Add key添加成功,到此用户developer01对此项目仓库将具备管理员赋予的权限。
Web页面:
进入项目,点击左侧面板Files选项,可进行文件的编辑、上传,文件夹的上传,创建新分支和标签(管理员)等行为。

例:创建一个新文本文件filetest01:
![]()

提交后叫在左侧的Merge Requests将出现此合并请求。
命令行:
新建Git项目:
Git global setup(Git全局设置):
$ git config --global user.name "name"
$ git config --global user.email "name@email.com"
Create Repository(创建仓库)
$ mkdir common-util
$ cd common-util
$ git init
添加并提交文件:
$ touch README
$ git add README
$ git commit -m 'first commit'
$ git remote add origin git@server:devteam/common-util.git
$ git push -u origin master
添加已存在Git项目:
$ cd existing_git_repo
$ git remote add origin git@server:devteam/common-util.git
$ git push -u origin master
到此可正常进行git操作,具体请参看第一部分。
客户端:
本教程介绍的客户端均为Windows环境下。
SourceTree
使用SourceTree软件进行代码开发的管理,客户端免费支持windows和苹果系统,下载地址:http://www.sourcetreeapp.com/。
安装过程中需要认证用户,在FQ环境下访问Atlassian注册账户后继续安装,之后会下载一些依赖,完成后可选择跳过初始设置。

这里对SSH key登录进行讲解:
1、生成SSH keys:点击工具--创建SSH秘钥--点击Generate--点击Save public key和save private key,保存好公钥和私钥

2、Gitlab 配置SSH keys:浏览器打开Gitlab登录自己的账户,按前面提到的方法添加公钥SSH keys。
3、客户端导入私钥:回到source tree的工具,点击“选项”,选择上次生成的SSH秘钥,点击“确定”即可添加成功。
4、SSH助手配置:点击“启动SSH助手”,点击“Add Key”,选择之前导出的私钥,添加成功后,查看公钥跟Gitlab网页添加的相同,则说明配置成功。
Eclipse中使用git--Egit:
EGit是Eclipse上的Git插件,官方内容参看:http://wiki.eclipse.org/EGit
EGIT使用教程:http://my.oschina.net/doloop/blog/221800
Git Bash+EGit在项目中配合使用最常用方法:
http://blog.csdn.net/hongshan50/article/details/22582049
Visual Studio 中使用git:
官方教程:https://www.visualstudio.com/en-us/get-started/code/gitquickstart
PS:
最近入职新的团队,需要搭建Git服务器,这就有了这篇博文,希望能对读者有所帮助。
今天是5-2-0,祝还单着的程序猿们(包括我)都找到自己的lovely girl!

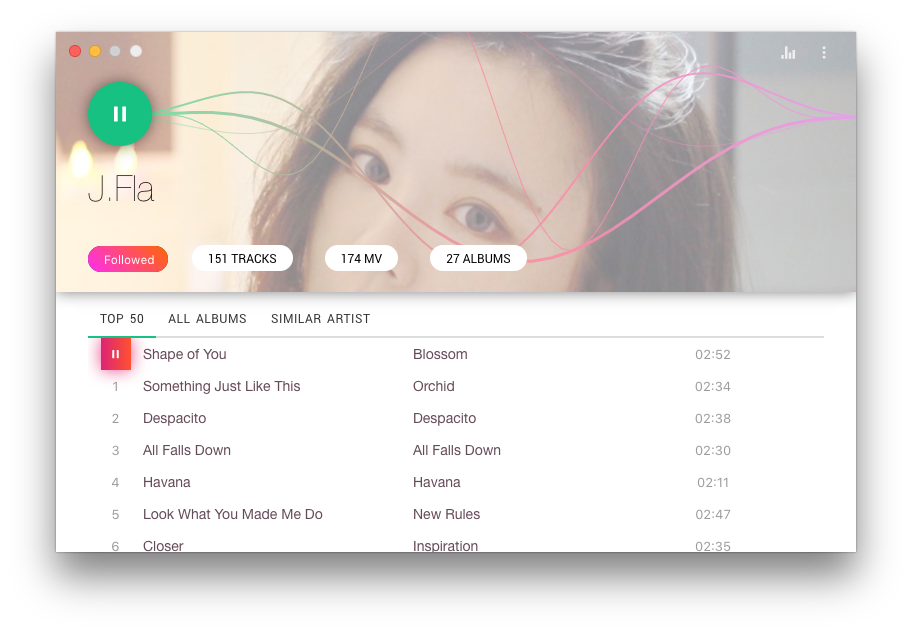
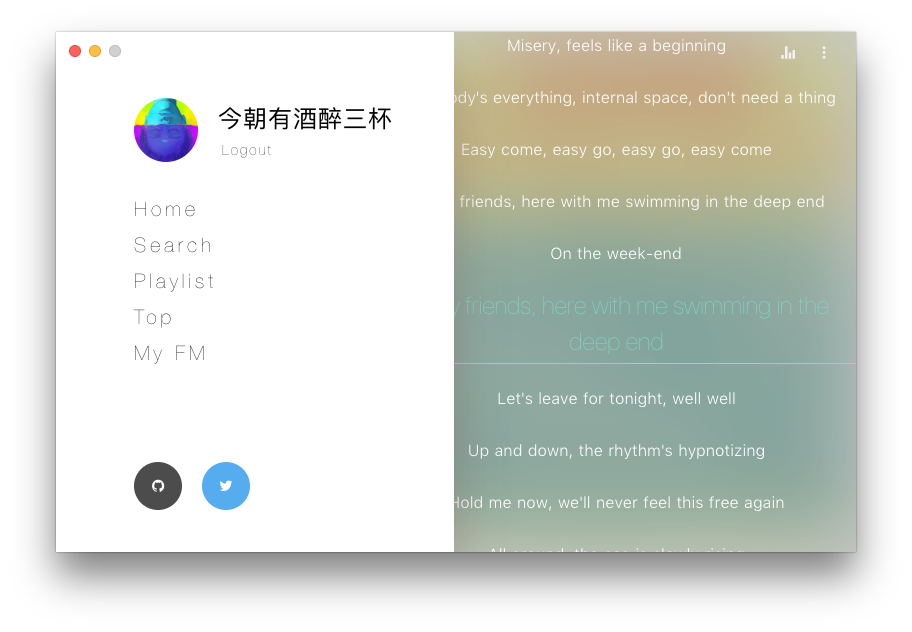
Elegant NeteaseMusic desktop app, Rock with NeteaseMusic
Built by Electron, React, MobX, JSS
API 由 Binaryify/NeteaseCloudMusicApi 提供。

帅
很帅
非常帅
JSS Theme support
OSX Friendly
Cross Platform
Keyboard support
Desktop notifications
Modern UI design
High quality music(FLAC)
Track your listen to Last.fm
Fix dead music link #3(QQ music, Xiami music, Kugou music, Kuwo music, MiGu music, Biadu music all in one)
Share music to Facebook, Twitter, Google+, WeChat
WeChat scan to log in
Download music 

Alfred 3 workflow(alfred-ieasemusic), required v1.2.6+

Download the last version on the website or below.
Download the .dmg file, Or use homebrew:
brew cask install ieasemusicDownload the .deb file for 'Debian / Ubuntu':
$ sudo dpkg -i ieaseMusic-1.3.4-linux-amd64.debDownload the .rpm file for 'Centos/RHEL':
$ sudo yum localinstall ieaseMusic-1.3.4-linux-x86_64.rpmDownload the .Appimage file for other distribution:
$ chmod u+x iease-music-1.3.4-x86_64.AppImage$ ./iease-music-1.3.4-x86_64.AppImageArchlinux pacman install:
$ pacman -S iease-musicor
$ pacman -S iease-music-git


git submodule initgit submodule update --remote --merge$ npm install$ npm run dev修改/etc/hosts添加
158.199.142.239 music.163.com163.171.98.219 p1.music.126.net163.171.98.219 p3.music.126.net163.171.98.219 p4.music.126.net202.122.146.83 m10.music.126.net上面是日本反代节点fengjueming/unblock-NetEaseMusic
新加坡节点(本屌太穷有需要还是尽量用上面的节点吧)
52.221.201.48 music.163.com
关于优化IP地址,p开头的是图片CDN服务器,m开头的是音乐资源CDN服务器。可以通过
ping ws.acgvideo.com来寻找最优的音乐资源CDN服务器。通过
ping cdnetworks.com来寻找最优的图片资源CDN服务器。
| Description | Keys |
|---|---|
| 暂停/播放 | Space |
| 上一曲 | Left |
| 下一曲 | Right |
| 音量加 | Up |
| 音量减 | Down |
| 喜欢歌曲 | Cmd L |
| 播放历史记录 | Cmd 0 ... 9 |
| 搜索 | Cmd F |
| 显示下载歌曲 | Shift Cmd D |
| 跳转首页 | Shift Cmd H |
| 查看榜单 | Shift Cmd T |
| 所有歌单 | Shift Cmd P |
| 我的电台 | Shift Cmd F |
| 菜单 | Shift Cmd L |
| 播放列表 | Cmd P |
| 偏好设置 | Cmd , |
| 偏好设置 | 鼠标右键 |
UNBLOCK
添加其他曲库,解决死链问题ITJesse/UnblockNeteaseMusic
还是 MIT 吧,懒得改了


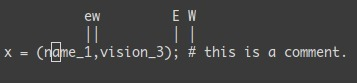
tl;dr*: You want to teach yourself vim (the best text editor known to human kind) in the fastest way possible. This is my way of doing it. You start by learning the minimal to survive, then you integrate all the tricks slowly.
Vim† the Six Billion Dollar editor
Better, Stronger, Faster.
Learn vim† and it will be your last text editor. There isn’t any better text editor that I know of. It is hard to learn, but incredible to use.
I suggest you teach yourself Vim in 4 steps:
By the end of this journey, you’ll become a vim superstar.
But before we start, just a warning. Learning vim will be painful at first. It will take time. It will be a lot like playing a musical instrument. Don’t expect to be more efficient with vim than with another editor in less than 3 days. In fact it will certainly take 2 weeks instead of 3 days.
In a standard editor, typing on the keyboard is enough to write something and see it on the screen. Not this time. Vim is in Normal mode. Let’s go to Insert mode. Type the letter i.
You should feel a bit better. You can type letters like in a standard editor. To get back to Normal mode just press the ESC key.
You now know how to switch between Insert and Normal mode. And now, here are the commands that you need in order to survive in Normal mode:
- -
i→ Insert mode. TypeESCto return to Normal mode.- -
x→ Delete the char under the cursor- -
:wq→ Save and Quit (:wsave,:qquit)- -
dd→ Delete (and copy) the current line- -
p→ PasteRecommended:
- -
hjkl(highly recommended but not mandatory) → basic cursor move (←↓↑→). Hint:jlooks like a down arrow.- -
:help <command>→ Show help about<command>. You can use:helpwithout a<command>to get general help.
Only 5 commands. That is all you need to get started. Once these command start to become natural (maybe after a day or so), you should move on to level 2.
But first, just a little remark about Normal mode. In standard editors, to copy you have to use the Ctrl key (Ctrl-c generally). In fact, when you press Ctrl, it is as if all of your keys change meaning. Using vim in normal mode is a bit like having the editor automatically press the Ctrl key for you.
A last word about notations:
Ctrl-λ, I’ll write <C-λ>.: end with <enter>. For example, when I write :q, I mean :q<enter>.You know the commands required for survival. It’s time to learn a few more commands. These are my suggestions:
Insert mode variations:
- -
a→ insert after the cursor- -
o→ insert a new line after the current one- -
O→ insert a new line before the current one- -
cw→ replace from the cursor to the end of the word
Basic moves
- -
0→ go to the first column- -
^→ go to the first non-blank character of the line- -
$→ go to the end of line- -
g_→ go to the last non-blank character of line- -
/pattern→ search forpattern
Copy/Paste
- -
P→ paste before, rememberpis paste after current position.- -
yy→ copy the current line, easier but equivalent toddP
Undo/Redo
- -
u→ undo- -
<C-r>→ redo
Load/Save/Quit/Change File (Buffer)
- -
:e <path/to/file>→ open- -
:w→ save- -
:saveas <path/to/file>→ save to<path/to/file>- -
:x,ZZor:wq→ save and quit (:xonly save if necessary)- -
:q!→ quit without saving, also::qa!to quit even if there are modified hidden buffers.- -
:bn(resp.:bp) → show next (resp. previous) file (buffer)
Take the time to learn all of these command. Once done, you should be able to do every thing you are able to do in other editors. You may still feel a bit awkward. But follow me to the next level and you’ll see why vim is worth the extra work.
Congratulation for reaching this far! Now we can start with the interesting stuff. At level 3, we’ll only talk about commands which are compatible with the old vi editor.
Let’s look at how vim could help you to repeat yourself:
. → (dot) will repeat the last command,Some examples, open a file and type:
- -
2dd→ will delete 2 lines- -
3p→ will paste the text 3 times- -
100idesu [ESC]→ will write “desu desu desu desu desu desu desu desu desu desu desu desu desu desu desu desu desu desu desu desu desu desu desu desu desu desu desu desu desu desu desu desu desu desu desu desu desu desu desu desu desu desu desu desu desu desu desu desu desu desu desu desu desu desu desu desu desu desu desu desu desu desu desu desu desu desu desu desu desu desu desu desu desu desu desu desu desu desu desu desu desu desu desu desu desu desu desu desu desu desu desu desu desu desu desu desu desu desu desu desu”- -
.→ Just after the last command will write again the 100 “desu”.- -
3.→ Will write 3 “desu” (and not 300, how clever).
Knowing how to move efficiently with vim is very important. Don’t skip this section.
G → Go to line Ngg → shortcut for 1G - go to the start of the fileG → Go to last lineWord moves:
w→ go to the start of the following word,e→ go to the end of this word.By default, words are composed of letters and the underscore character. Let’s call a WORD a group of letter separated by blank characters. If you want to consider WORDS, then just use uppercase characters:
W→ go to the start of the following WORD,E→ go to the end of this WORD.
Now let’s talk about very efficient moves:
- -
%: Go to the corresponding(,{,[.- -
*(resp.#) : go to next (resp. previous) occurrence of the word under the cursor
Believe me, the last three commands are gold.
Remember about the importance of vi moves? Here is the reason. Most commands can be used using the following general format:
<start position><command><end position>
For example : 0y$ means
0 → go to the beginning of this liney → yank from here$ → up to the end of this lineWe also can do things like ye, yank from here to the end of the word. But also y2/foo yank up to the second occurrence of “foo”.
But what was true for y (yank), is also true for d (delete), v (visual select), gU (uppercase), gu (lowercase), etc…
With all preceding commands you should be comfortable using vim. But now, here are the killer features. Some of these features were the reason I started to use vim.
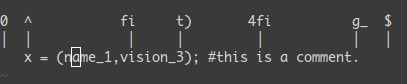
0 ^ $ g_ f F t T , ;
- -
0→ go to column 0- -
^→ go to first character on the line- -
$→ go to the last column- -
g_→ go to the last character on the line- -
fa→ go to next occurrence of the letteraon the line.,(resp.;) will find the next (resp. previous) occurrence.- -
t,→ go to just before the character,.- -
3fa→ find the 3rd occurrence ofaon this line.- -
FandT→ likefandtbut backward.
A useful tip is: dt" → remove everything until the ".
<action>a<object> or <action>i<object>These command can only be used after an operator in visual mode. But they are very powerful. Their main pattern is:
<action>a<object> and <action>i<object>
Where action can be any action, for example, d (delete), y (yank), v (select in visual mode). The object can be: w a word, W a WORD (extended word), s a sentence, p a paragraph. But also, natural character such as ", ', ), }, ].
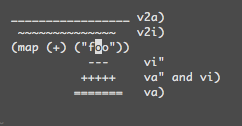
Suppose the cursor is on the first o of (map (+) ("foo")).
- -
vi"→ will selectfoo.- -
va"→ will select"foo".- -
vi)→ will select"foo".- -
va)→ will select("foo").- -
v2i)→ will selectmap (+) ("foo")- -
v2a)→ will select(map (+) ("foo"))
<C-v>.Rectangular blocks are very useful for commenting many lines of code. Typically: 0<C-v><C-d>I-- [ESC]
^ → go to the first non-blank character of the line<C-v> → Start block selection<C-d> → move down (could also be jjj or %, etc…)I-- [ESC] → write -- to comment each line
Note: in Windows you might have to use <C-q> instead of <C-v> if your clipboard is not empty.
<C-n> and <C-p>.In Insert mode, just type the start of a word, then type <C-p>, magic…
qa do something q, @a, @@qa record your actions in the register a. Then @a will replay the macro saved into the register a as if you typed it. @@ is a shortcut to replay the last executed macro.
Example
On a line containing only the number 1, type this:
- -
qaYp<C-a>q→
- -
qastart recording.- -
Ypduplicate this line.- -
<C-a>increment the number.- -
qstop recording.- -
@a→ write 2 under the 1- -
@@→ write 3 under the 2- -Now do
100@@will create a list of increasing numbers until 103.
v,V,<C-v>We saw an example with <C-v>. There is also v and V. Once the selection has been made, you can:
J → join all the lines together.< (resp. >) → indent to the left (resp. to the right).= → auto indent
Add something at the end of all visually selected lines:
<C-v>jjj or <C-d> or /pattern or % etc…)$ go to the end of the lineA, write text, ESC.
:split and vsplit.These are the most important commands, but you should look at :help split.
- -
:split→ create a split (:vsplitcreate a vertical split)- -
<C-w><dir>: where dir is any ofhjklor ←↓↑→ to change the split.- -
<C-w>_(resp.<C-w>|) : maximise the size of the split (resp. vertical split)- -
<C-w>+(resp.<C-w>-) : Grow (resp. shrink) split
That was 90% of the commands I use every day. I suggest that you learn no more than one or two new commands per day. After two to three weeks you’ll start to feel the power of vim in your hands.
Learning Vim is more a matter of training than plain memorization. Fortunately vim comes with some very good tools and excellent documentation. Run vimtutor until you are familiar with most basic commands. Also, you should read this page carefully: :help usr_02.txt.
Then, you will learn about !, folds, registers, plugins and many other features. Learn vim like you’d learn piano and all should be fine.
If you liked this article, there is a follow up: Vim as IDE†
 ADA:
ADA:DdzFFzCqrhtAvdkmATx5Fm8NPJViDy85ZBw13p4XcNzVzvQg8e3vWLXq23JQWFxPEXK6Kvhaxxe7oJt4VMYHxpA2vtCFiP8fziohN6Yp本站总访问量次


 Watch
Watch Fork
Fork


 Projects
 Wiki
Wiki Insights


 MIT
MIT


 README.md